Categories
Sound Design and Production Concepts Synthesizer Concepts

Phase Distortion Synthesis (PDS)

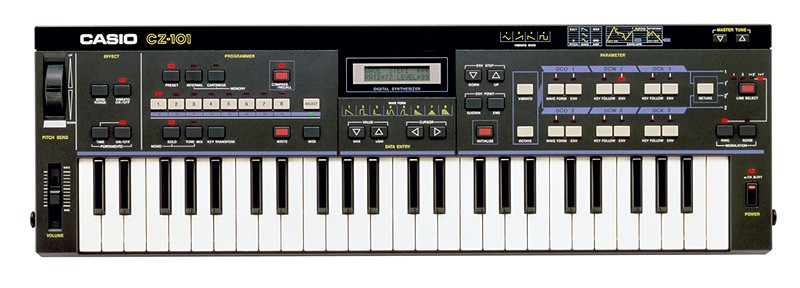
Phase Distortion Synthesis (PDS) is a technique for creating sounds that are used in creating electronic music, particularly in the mid-1980s Casio CZ synthesizers. The method, which is based on changing a waveform‘s phase, gives users more control over a sound’s harmonic composition. This makes it possible to produce a wider variety of sounds than traditional subtractive synthesis.

By changing the phase of a fundamental waveform, typically a sine wave, PDS produces sound by generating a new waveform with new harmonic content. Complex sounds that would be challenging or impossible to create using conventional subtractive synthesis can be produced by manipulating the waveform’s phase.

One of PDS’s main benefits is that it makes it possible to produce sounds with a variety of harmonic content. Bass, leads, and percussive sounds can all be produced this way. Additionally, it enables the production of intricate and changing sounds that are challenging to achieve using conventional subtractive synthesis.

PDS also offers extensive control over a sound’s harmonic composition, which can be used to produce unusual and distinctive sounds. This has led to it becoming a well-liked option for musicians and producers looking to incorporate unique and distinctive sounds into their music.

In general, phase distortion synthesis is a robust and adaptable method of sound creation that can create a variety of sounds. It has become a popular option among musicians and producers looking to produce distinctive and one-of-a-kind sounds. It is still used today in many types of electronic music production.

Categories
Sound Design and Production Concepts Synthesizer Concepts

Wavetable

A wavetable is a group of sound samples stored digitally and used as the foundation for wavetable synthesis in synthesizers. It is a table of values that creates a digital representation of a waveform by representing the amplitude of a sound at various points in time. This waveform could be a straightforward sine wave or a more complex sound, like an instrument recording or a soundscape.

Wavetable synthesis uses the samples in the wavetable as the starting point for creating new sounds and uses wavetables. An oscillator that can be modulated to produce different sounds reads the wavetable. For instance, the index can be modulated to move through the wavetable at different rates, changing the harmonic content and overall character of the sound. The oscillator’s frequency can also alter the sound’s pitch.

In summary, a wavetable is a group of sound samples that can be used as the foundation for sound synthesis using wavetable synthesis and is stored in a digital format. It can be modulated to produce various sounds and read by an oscillator to generate a sound.

Categories
Sound Design and Production Concepts Synthesizer Features

Voices

A voice in a synthesizer is a standalone sound-generating or sound-processing unit that can create sounds independently. How many sounds a synthesizer can produce at once is determined by the number of voices it has.

For instance, a synthesizer with four voices can simultaneously produce four different sounds. This can be used to play multiple notes simultaneously, such as when playing a melody, or to create complex and layered sounds, such as chords.

One can also refer to a synthesizer as polyphonic if it has several voices. Monophonic refers to a synthesizer that can only play one note at a time. It is possible to switch between monophonic and polyphonic modes on some synthesizers.

Depending on the synthesis technique it employs, a synthesizer can produce a variety of voices. Oscillators, filters, and envelopes make up the voices of some subtractive synthesis synthesizers. Some people create voices using wavetable synthesis, which uses wavetables, filters, and envelopes. Granular synthesis is a synthesizer in which the voices are composed of grains, filters, and envelopes.

Additionally, some synthesizers have features like voice layering, voice stacking, and voice splitting that let you use multiple voices in various ways. For instance, you could layer various sounds to create complex timbres or divide the keyboard into different zones and assign multiple sounds to each zone.

Generally, a synthesizer’s capabilities and the types of sounds it can create depend on the number of voices it has and the voices it employs. These factors should be taken into account when selecting a synthesizer.

Categories
Sound Design and Production Concepts

Digital Audio Workstation (DAW)

A Digital Audio Workstation (DAW) is a piece of hardware or software used to create, edit, and record audio files. DAWs typically come with a wide range of features and tools that let users record, edit, mix, and master audio, among other things.

A typical DAW will have a central interface that enables waveform viewing and editing for audio files. Various virtual instruments, effects, and tools for editing, processing, and manipulating audio will also be included, including equalization, compression, reverb, and more. DAWs frequently allow plug-ins, which are different software applications that can be used to extend the DAW’s functionality.

Additionally, MIDI sequencing features are found in many DAWs, enabling users to record and edit MIDI data and use virtual instruments and external MIDI-enabled devices. Some DAWs can record and edit video files, making them helpful in creating music and video.

DAWs are an indispensable tool for professional music producers, audio engineers, and home studio enthusiasts because they offer a complete and potent solution for music production, audio post-production, sound design, and recording.

Examples

  • Ableton Live
  • Logic Pro
  • Pro Tools
  • FL Studio
  • Cubase
  • Reason Studios
Categories
Common Synthesizer Controls Sound Design and Production Concepts

Detune

Detuning is the process of slightly shifting the pitch of one or more oscillators within a patch (a sound configuration) away from the main pitch in a synthesizer. Smaller amounts, like a few cents (a unit of measurement for pitch), or more significant amounts, like a semitone or more, can be used to accomplish this.

By making a single sound appear as though multiple voices are playing at once, detune can be used to give a sound a sense of thickness or width. It can also give a sound a sense of motion or animation.

Depending on the synthesizer, detuning can be done globally or individually across each oscillator. Others may use a pitch offset or frequency offset feature to create the same effect. Some synthesizers have a “detune” knob or parameter that can be adjusted.

Detune can also be applied in different ways:

Categories
Common Synthesizer Controls Sound Design and Production Concepts

Octave Control

A synthesizer’s octave control is a feature that enables the user to change the sound’s pitch up or down by one or more octaves. The frequency of a note is doubled or halved in an octave, a musical interval that spans 12 semitones (the space between two notes on a piano).

The pitch of a sound can be changed to match the key of a song or to add tension or dissonance to a melody using an octave control. By gradually changing the pitch up or down, it is also possible to give a sound a sense of motion or animation.

Many synthesizers have an octave control, which may be a knob, a button, or a switch, allowing the user to alter the sound’s pitch in steps of one or more octaves. Some keyboard controllers also have an octave control that can be used to adjust the pitch of an attached hardware synthesizer or a software synthesizer.

Overall, the octave control is a straightforward but practical feature that can be used to add character and depth to a sound and give a synthesizer patch a sense of motion and animation. Both the creation of music and live performances can benefit from it.

Categories
Common Synthesizer Controls Sound Design and Production Concepts

Unison

Unison is a feature that allows multiple voices (or oscillators) to play the same note simultaneously, which can create a thicker and more complex sound. This can be used to create a variety of sounds, from subtle thickening to aggressive and complex sounds, by layering multiple voices, each with the same pitch and characteristics.

Depending on the synthesizer, the number of voices in unison can vary, and some synths might let the user adjust the number of voices, the degree of detuning, and the stereo spread. The amount of detuning determines how far each voice is from its original pitch, which can result in a more organic and natural sound. A more expansive and immersive sound can be produced by adjusting the stereo spread, which determines how widely the sound is dispersed across the stereo field.

A classic synth sound, reminiscent of the fat analog synth sounds from the 1980s, can be produced using the Unison feature, frequently found on virtual analog or digital synthesizers. Additionally, it can build intricate and changing soundscapes or give a straightforward melody depth and movement. Some synths let you play multiple notes at once, and each note will start a new voice, increasing the synth’s polyphony.

In conclusion, the Unison feature layers different voices to give the sound more depth and complexity. The number of voices, degree of detuning, and stereo spread can all be changed. It is an effective tool for producing a variety of sounds, from traditional synth sounds to intricate soundscapes.

Categories
Common Synthesizer Controls Sound Design and Production Concepts

Mix Control

A mix control on a synthesizer refers to a knob or fader that allows the user to adjust the balance between different sound sources or elements within the synthesizer. This can include adjusting the balance between different oscillators, adjusting the balance between the dry and wet signals in a effects section, or adjusting the balance between different layers or elements in a patch.

For example, in a synthesizer with multiple oscillators, a mix control would allow the user to adjust the balance between the levels of each oscillator, which can be used to create a wide range of different sounds. Similarly, in a synth with a built-in effects section, a mix control can be used to adjust the balance between the dry, unprocessed sound and the wet, processed sound.

Mix control can also be used to adjust the balance between different layers or elements in a patch, such as between a lead sound and a background pad. This can be useful for creating more dynamic and expressive sounds, and for creating a sense of movement and evolution within a patch.

In summary, a mix control on a synthesizer is a knob or fader that allows the user to adjust the balance between different sound sources or elements within the synthesizer, such as different oscillators, dry/wet signals in effects section or different layers in a patch. It’s a powerful tool that can help to create a wide range of sounds and to add depth and dynamics to the sound.

Categories
Common Synthesizer Controls Sound Design and Production Concepts Synthesizer Concepts

Release

Release on a synthesizer refers to the amount of time it takes for a sound to fade out after a note is released. This parameter is typically found in the envelope section of a synthesizer, and it controls the amplitude envelope of the sound. The amplitude envelope is a graph that shows how the volume of a sound changes over time, and it is divided into four stages: attack, decay, sustain, and release.

The release stage is the final stage of the amplitude envelope, and it starts when a note is released, and it controls how long it takes for the sound to fade out after the note is released. A shorter release time will result in a sound that fades out quickly, while a longer release time will result in a sound that fades out slowly.

The release parameter is particularly useful for shaping the sound of sustained instruments such as pianos, strings and horns, and can be used to create a wide range of different effects. A short release time can be used to create a sharp and percussive sound, while a longer release time can be used to create a more natural and smooth sound. Additionally, Release can be used to create interesting sound effects like a “staccato” sound or a “legato” sound.

Categories
Common Synthesizer Controls Sound Design and Production Concepts

Sustain

On a synthesizer, sustain describes the period of time after the attack and decay phases of the amplitude envelope during which a sound is maintained at a constant volume. It regulates the amplitude envelope of the sound and is typically found in the envelope section of a synthesizer. The four stages of the amplitude envelope—a graph that depicts how a sound’s volume changes over time—are attack, decay, sustain, and release.

The sustain stage, which comes after the decay stage and is the third stage of the amplitude envelope, determines how long the sound will be held at a constant volume following the attack and decay stages. A sound will be held for a longer time when the sustain value is higher, while a sound will be held for a shorter time when the sustain value is lower.

The sustain parameter can produce various effects and is especially helpful for modifying the sound of percussive instruments like drums, pianos, and plucked instruments. It is possible to create a sound that lingers by using a high sustain value and a more transient sound by using a low sustain value.